

How to Apply a Vinyl Decal: Step-by-Step Guide
Saturday, October 3, 2026 - Comments
Posted by 78Queen Designs
How to Apply a Vinyl Decal
Applying a vinyl decal is easy when you take your time and prepare the surface correctly. Whether you're applying your decal to a car window, vehicle body panel, laptop, tumbler, or another smooth surface, these steps will help you get a clean, professional-looking result.
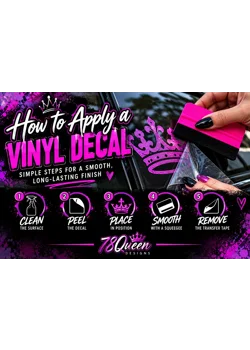
Step 1: Clean the Surface
Thoroughly clean the area where you plan to apply the decal. Remove any dirt, dust, grease, wax, or residue, then allow the surface to dry completely.
Step 2: Position the Decal
Before removing the backing paper, hold the decal in place to make sure you are happy with its position. For larger decals, you can use small pieces of masking or painter’s tape to help mark the placement.
Step 3: Remove the Backing Paper
Place the decal face down and slowly peel the backing paper away from the transfer tape. The vinyl decal should remain attached to the transfer tape. If part of the decal stays on the backing paper, lay it back down, press firmly over that area, and try again slowly.
Step 4: Apply the Decal
Carefully lower the decal and transfer tape onto the surface. Starting from the center and working outward, firmly press and smooth the decal using a squeegee, credit card, or similar flat-edged tool. This helps push out air and ensures the vinyl adheres evenly.
Step 5: Remove the Transfer Tape
Slowly peel the transfer tape back at a sharp angle rather than pulling it straight up. Watch the vinyl as you go. If any part of the decal begins lifting with the transfer tape, lay the tape back down, press the area firmly again, and continue peeling slowly.
Step 6: Let the Decal Set
After application, give the adhesive time to bond to the surface. Avoid washing, scrubbing, or heavily handling the decal for at least 24 hours after applying it.
Helpful Tips
For best results, apply your decal in a clean, dry area and avoid applying vinyl to extremely hot or cold surfaces. Take your time during application, especially with detailed designs.
If you need a different size, color, or a custom design, 78Queen Designs welcomes custom requests.
Featured Products


